MsXiaoZhu
Admin

Posts : 1
Join date : 2008-11-13
Age : 32
Location : Singapore
 |  Subject: SIGGY TUTORIAL FOR BEGINNERS. Subject: SIGGY TUTORIAL FOR BEGINNERS.  Fri Nov 14, 2008 10:53 am Fri Nov 14, 2008 10:53 am | |
| This is the bloody 3rd time I'm posting it. Web page expired AGAIN. Damn, I'm almost complete. I shall cut the crap of introducing Photoshop and Etc.
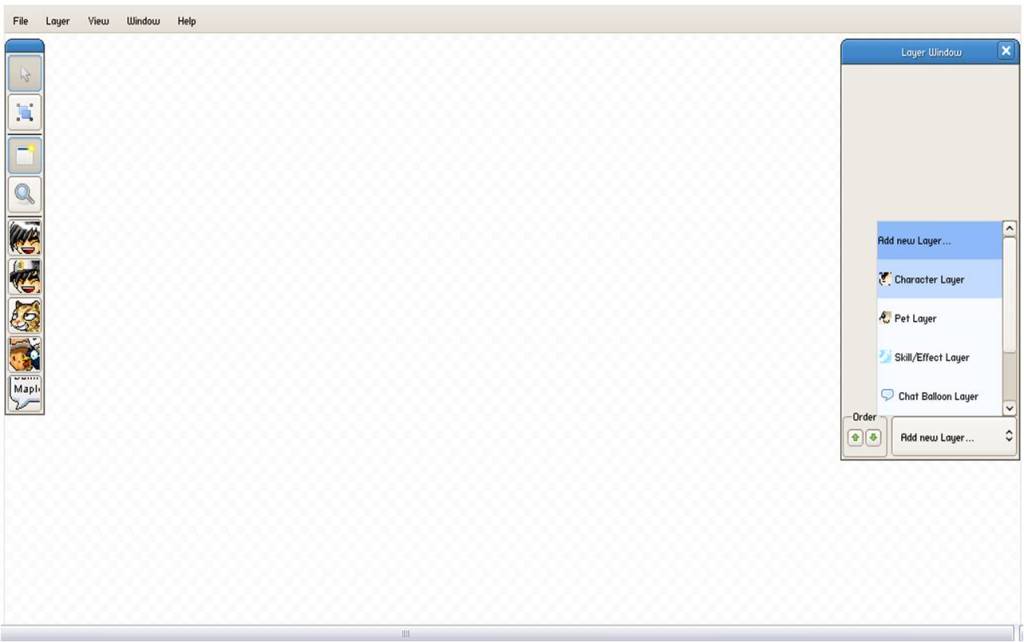

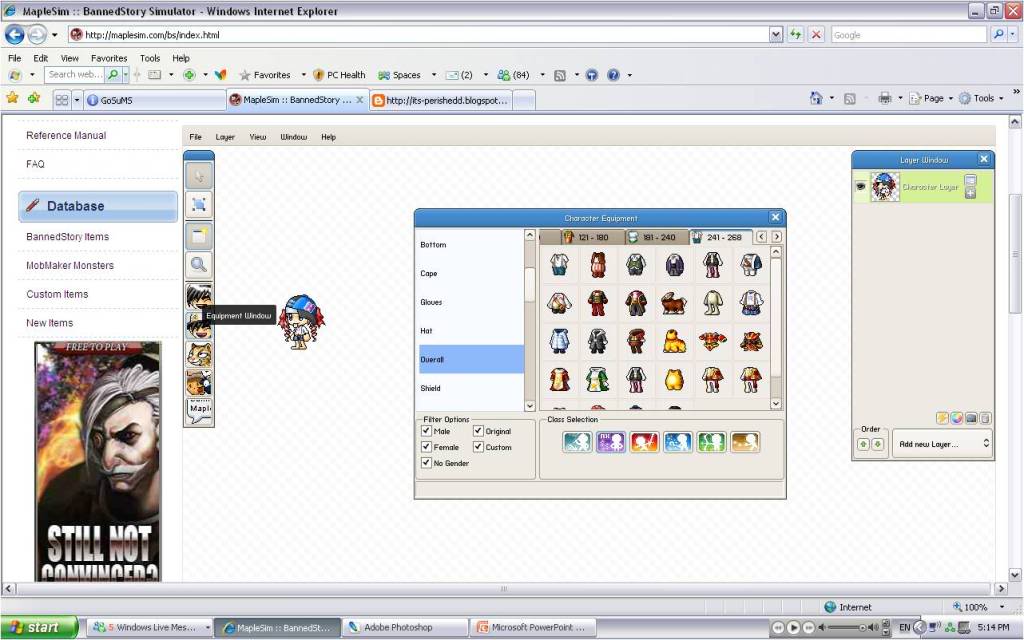
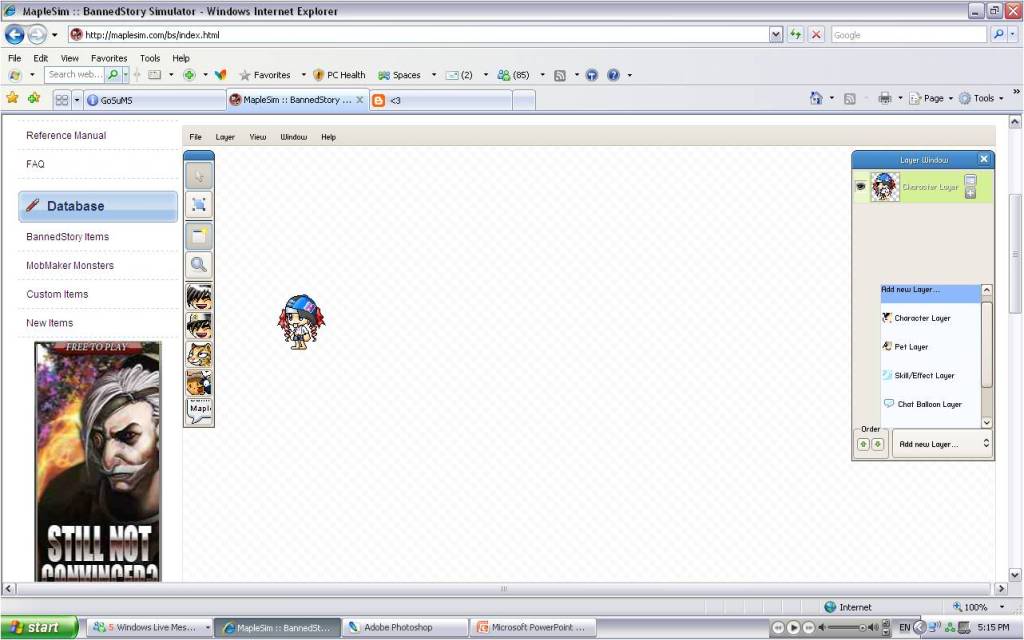
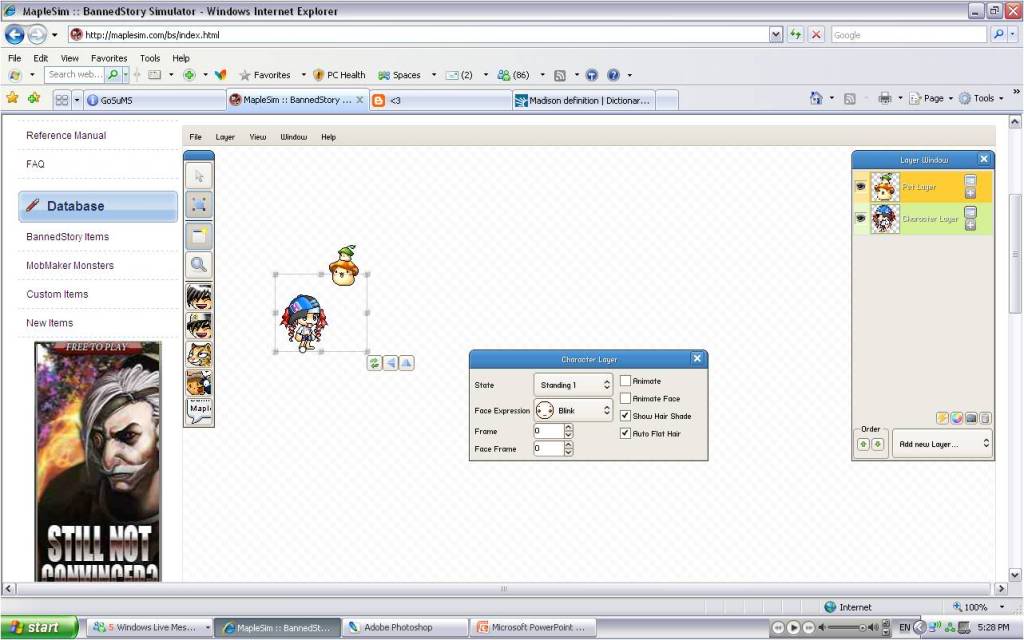
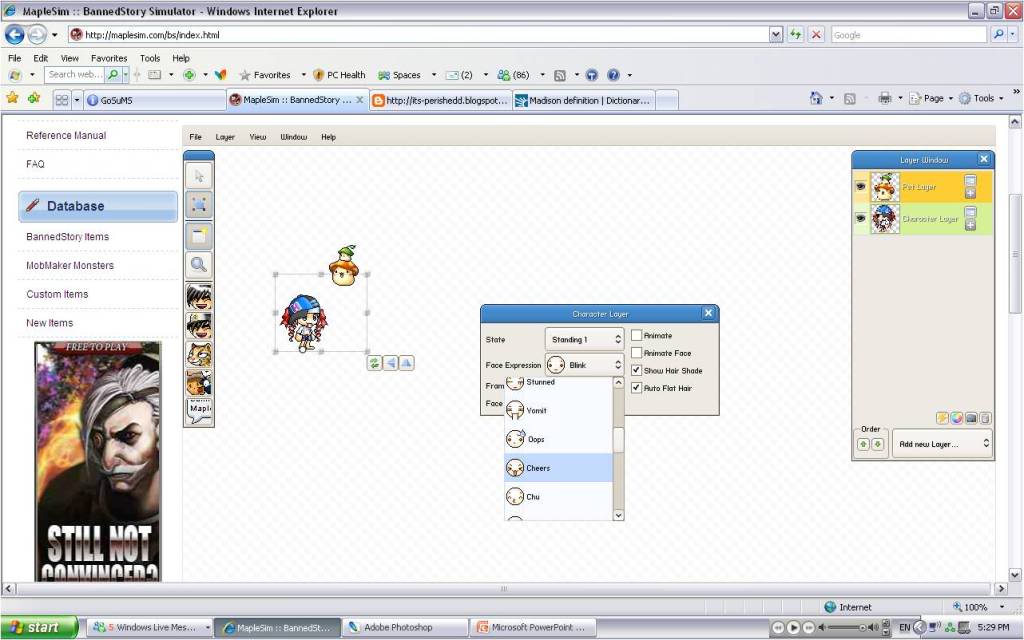

#1, Click on Add New Layer , Characer Layer.
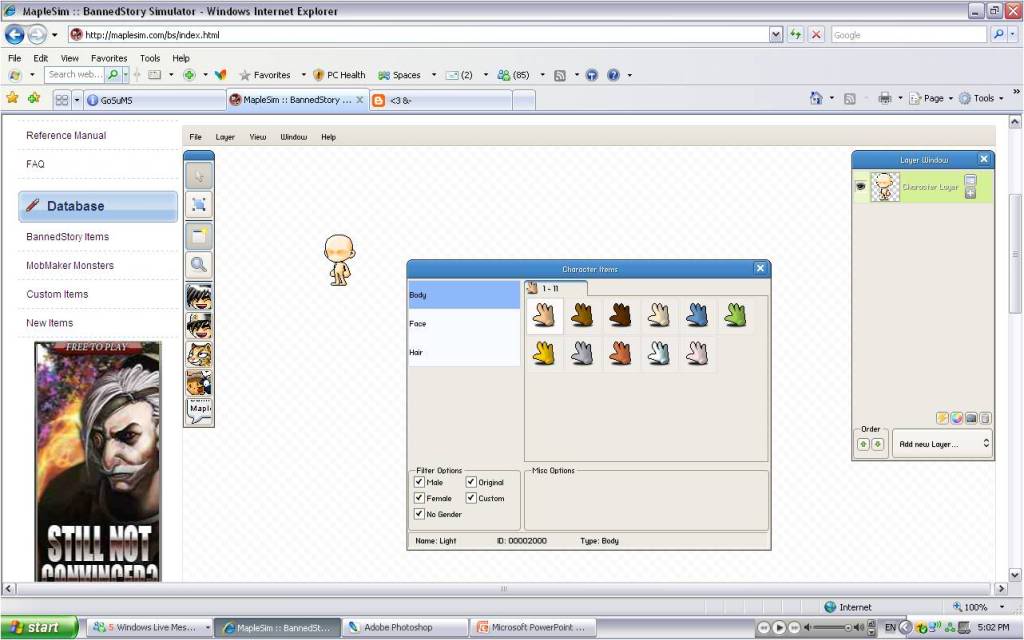
#2. Click on the Icon on the left hand side, Face w/o Hat
#3. Select Body to choose your skin colour.
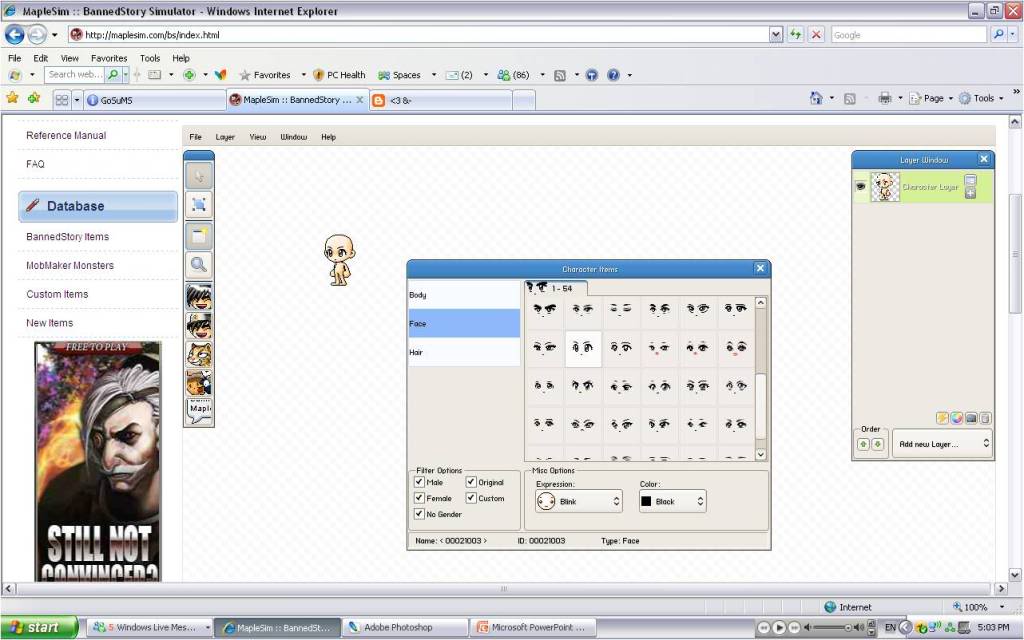
#4. Select Face to choose the eyes you like, you can also choose your expressions and eye colour.
#5. Select Hair to choose the hairstyle you prefered, you can choose your hair colour too.
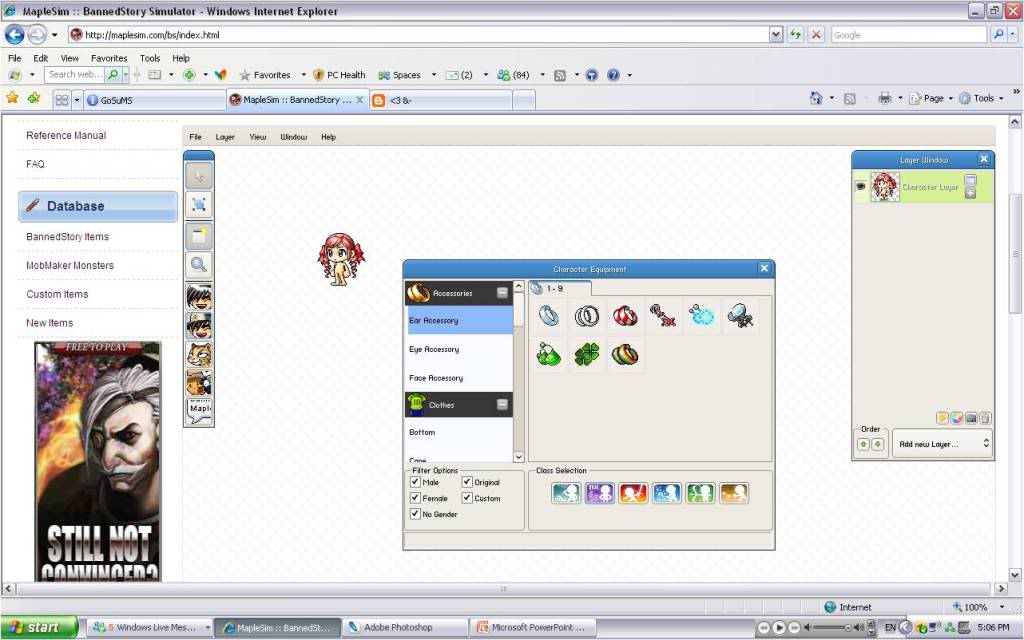
#6. Click on the Icon on the left hand side, Face with Hat. This is where you choose your accessories, Clothes and weapons.
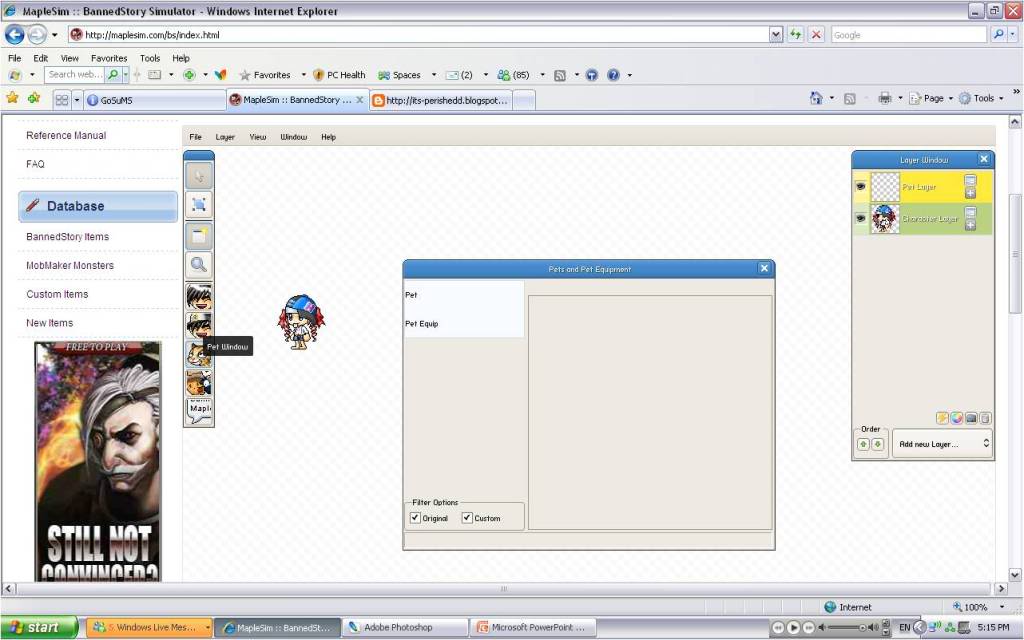
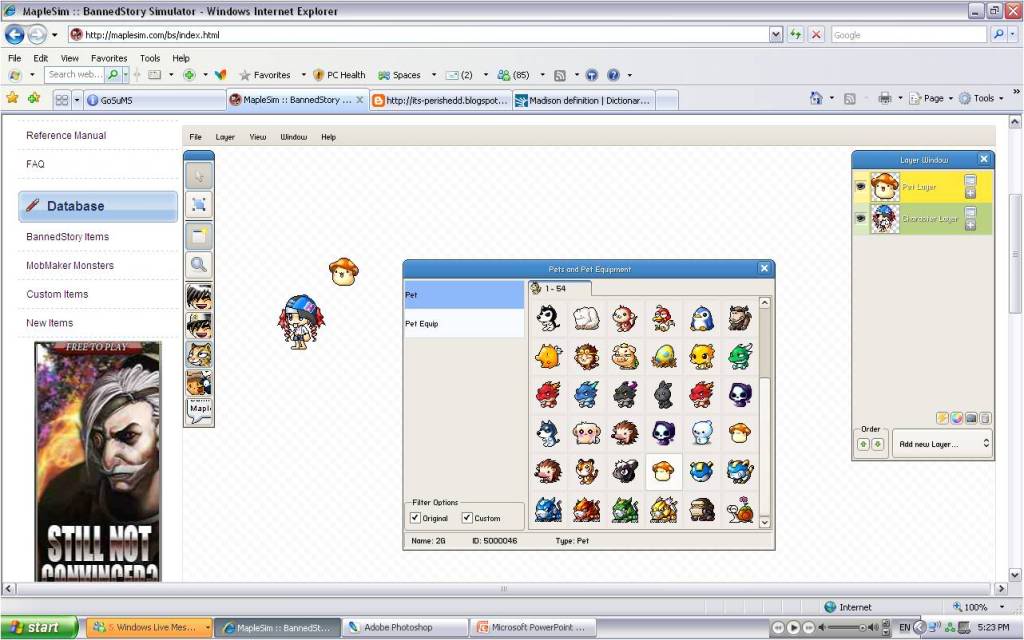
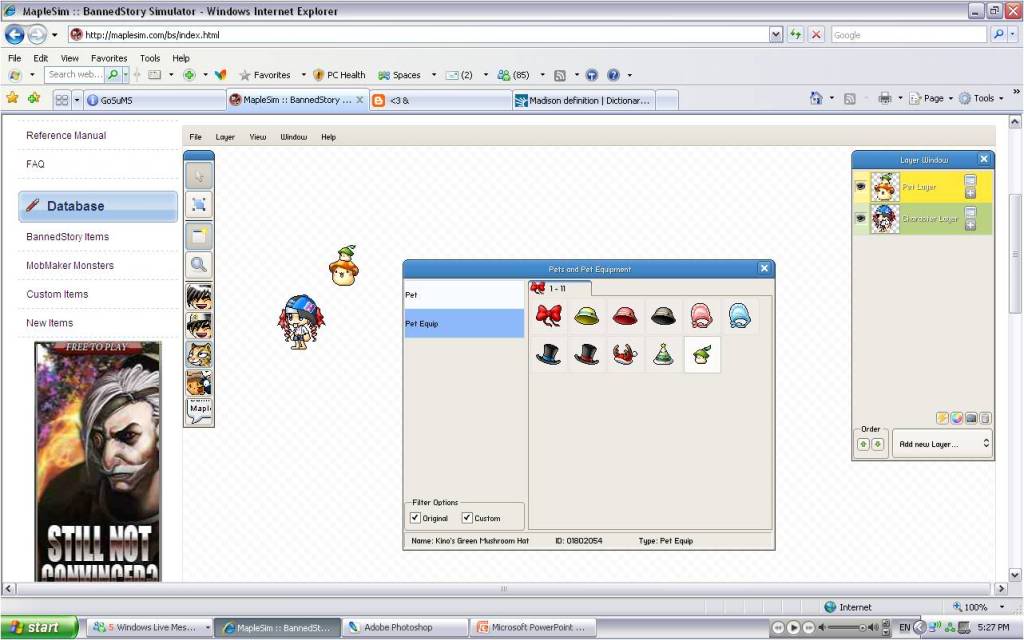
#7. Click on Add New Layer, Pet Layer. This is to add a pet in your siggy.
#8. Click on the Icon on the Left hand Side, Little Kitten's Face . So that you can choose the pet you like.
#9. Click on Pet Equips if you wish your pet to wear some equips.
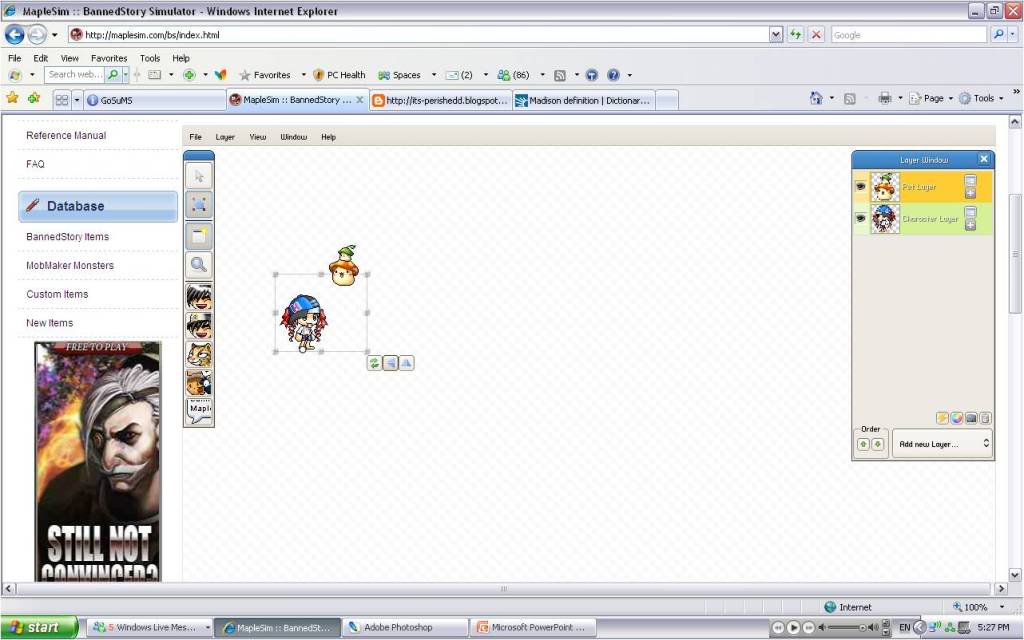
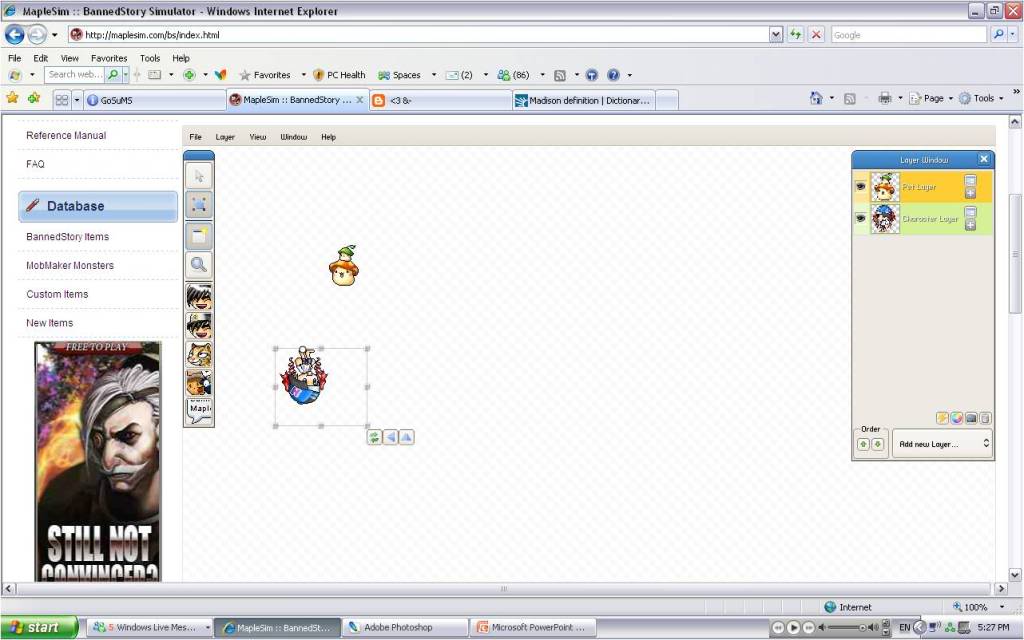
#10. The first tool on the the Left Hand Side is the Selection Tool. You can use this tool to move your char.
#11. The second tool on the Left Hand Side is the Rotate and Scale Tool..With this tool, u can flip your char horizontally/vertically/left/right.
How to add your character from BannedStory to Photoshop ?
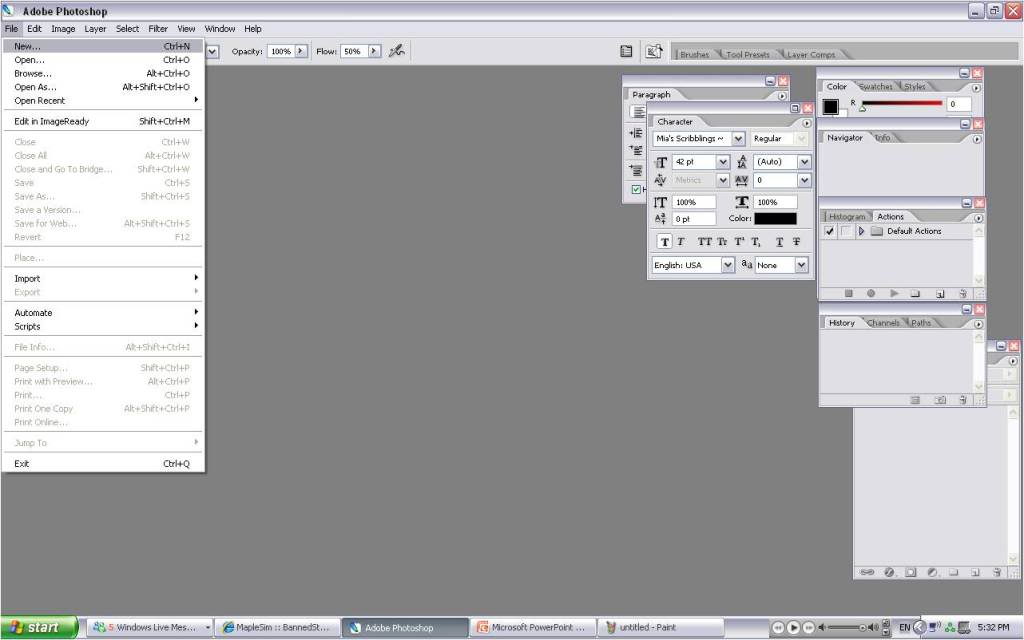
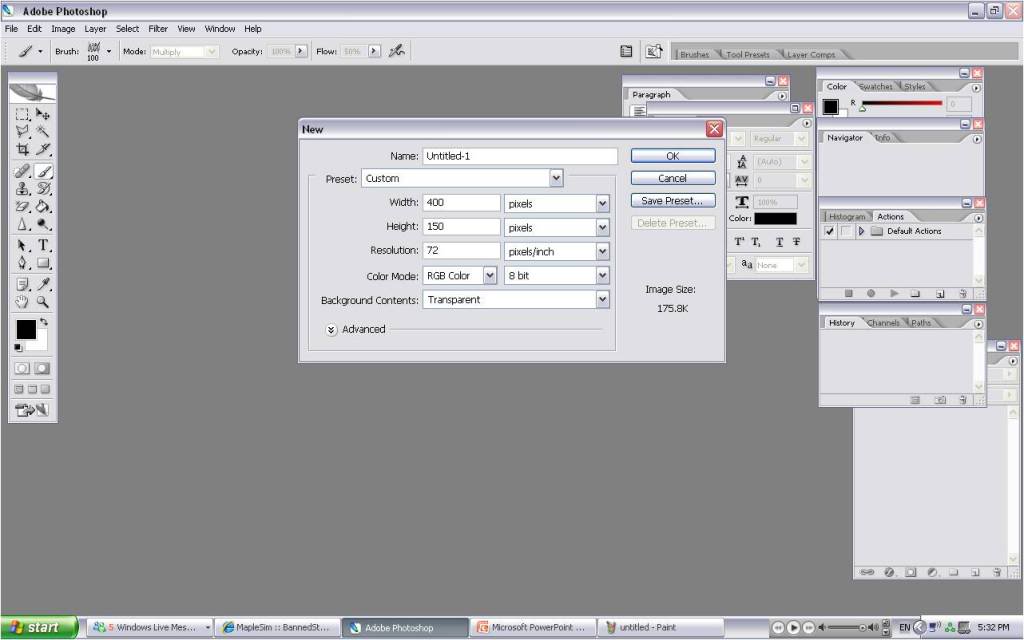
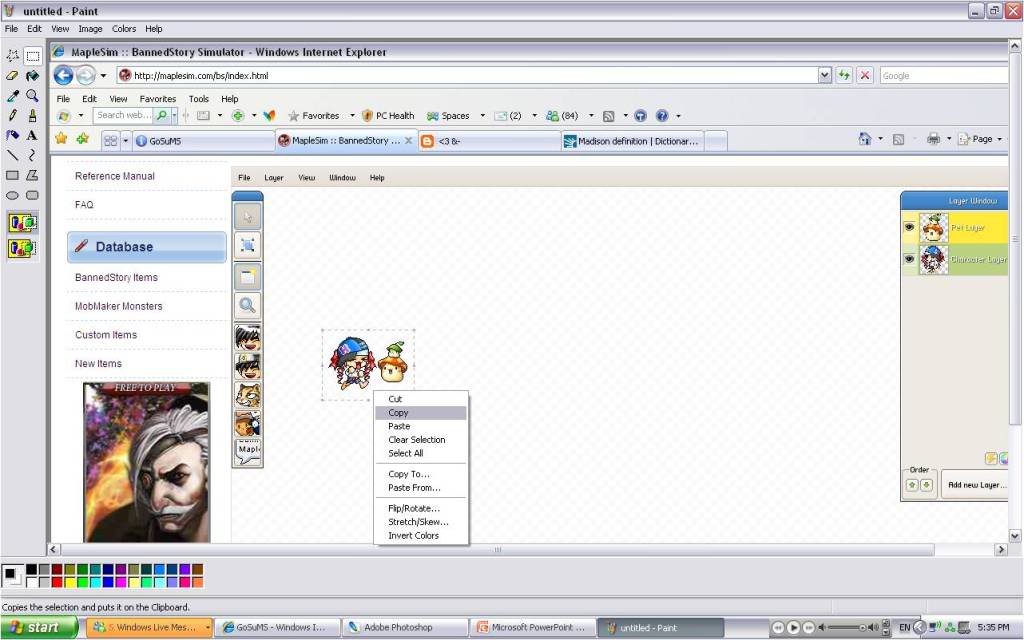


#1. Create a file from Photoshop . Go to File>New> Choose the propotion u want for your sig.
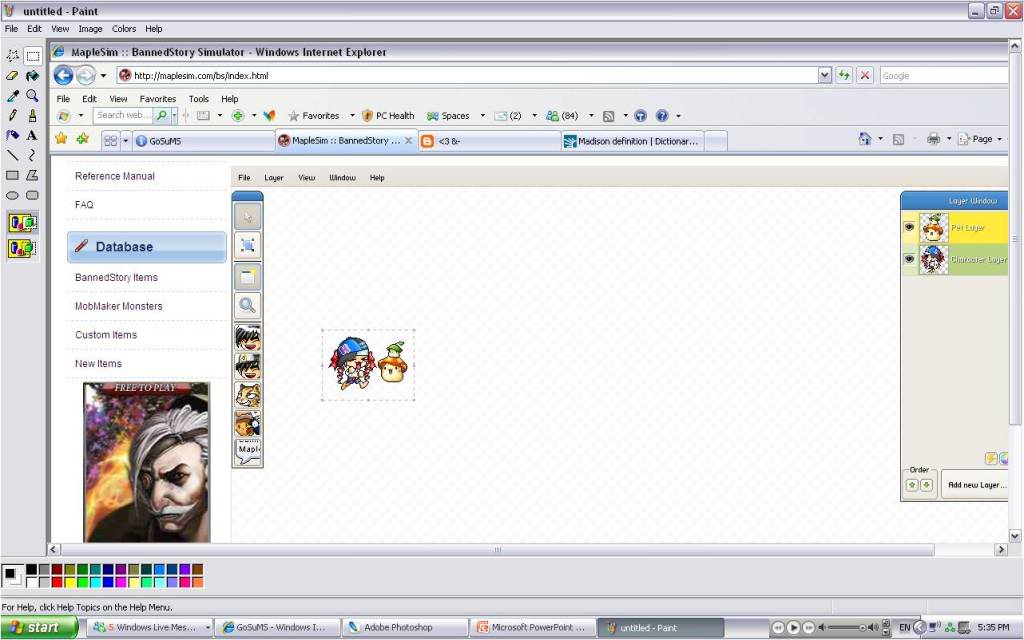
#2. Press 'Print Screen Sysrq' from your keyboard.
#3. Open Microsoft Paint and Hit Ctrl+V on your keyboard.
#4. Click on the Star tool once, then Click on the Rectangular tool.
#5. Box your char and hit Ctr+C on your keyboard, or you can choose to right click.
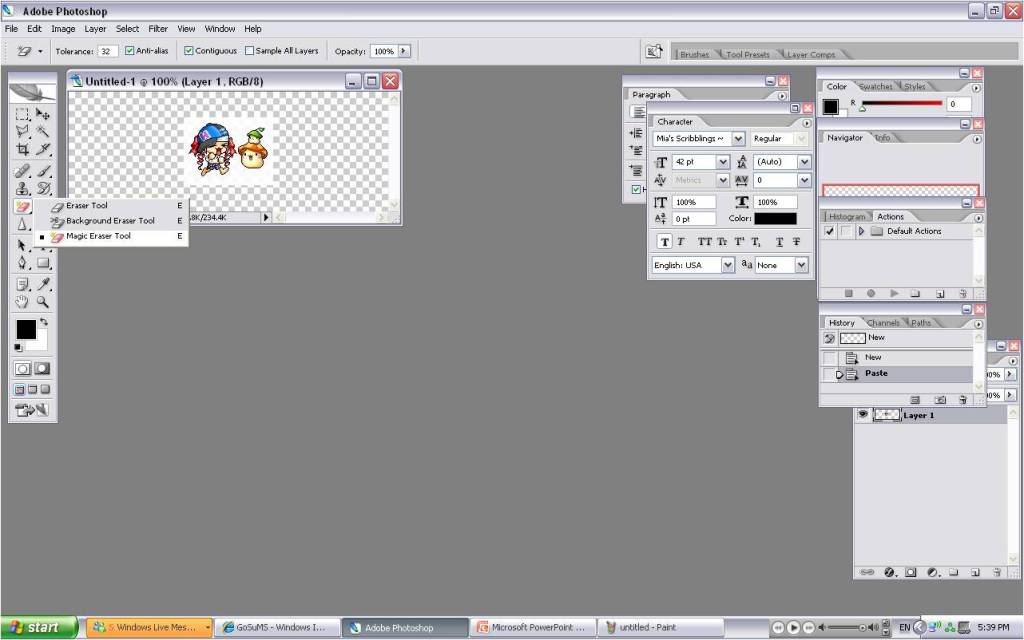
#6. Open back your Photoshop File, Hit Ctrl+V to get your char on the file.
#7. Click on the eraser tool, slightly drag abit to get Magic eraser tool. ( 6th Tool on the Left Column of Tool box.)
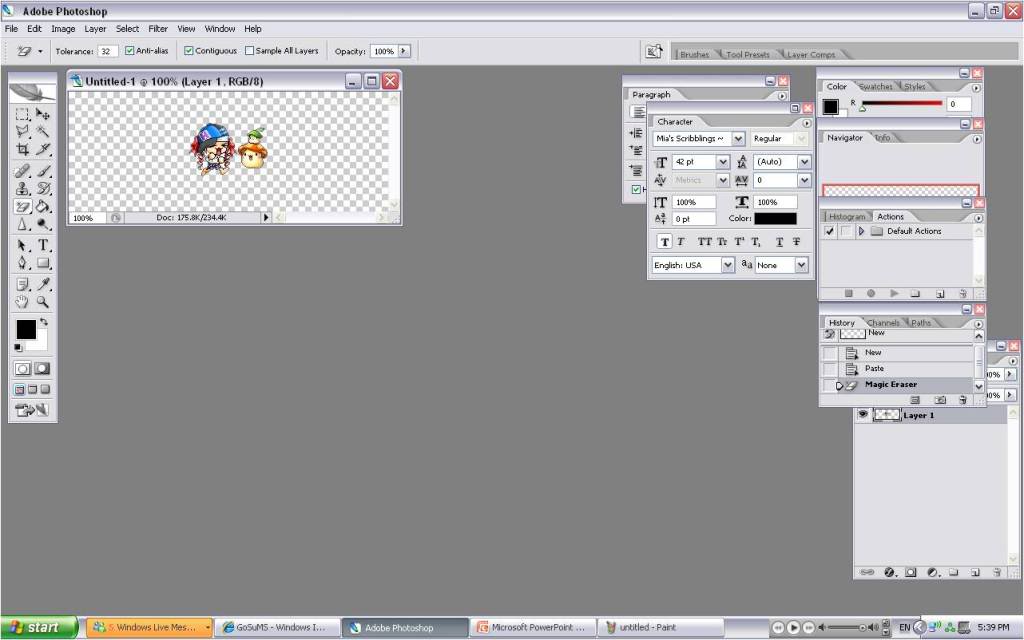
#8. Click on the white background of your char.
#9. White box gone.
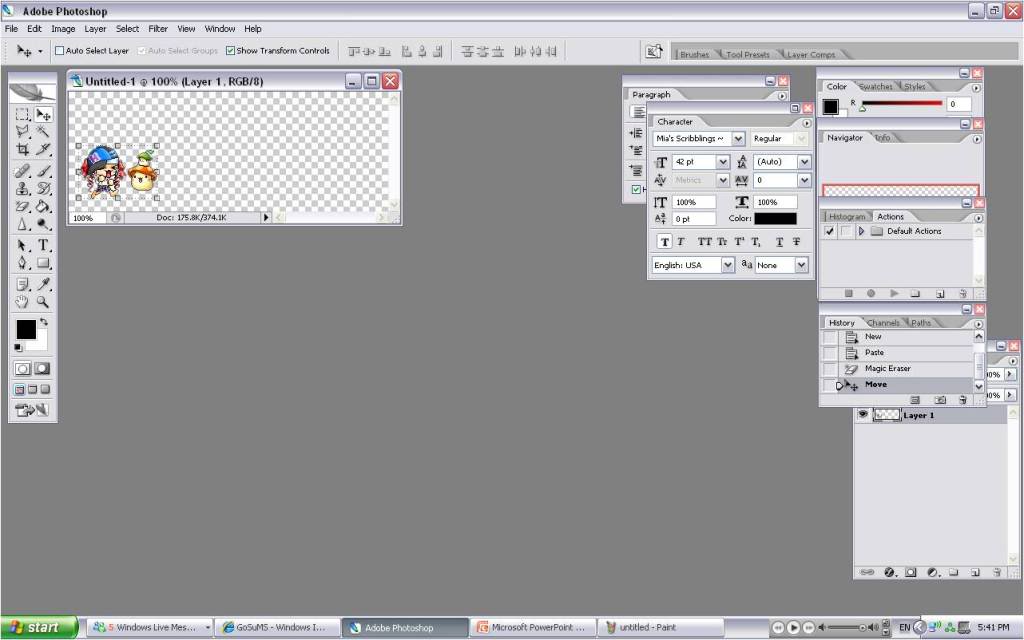
#10. Adjust your char to the place you want your char to be in your siggy using the Selection Tool ( 2nd Column of tool box)
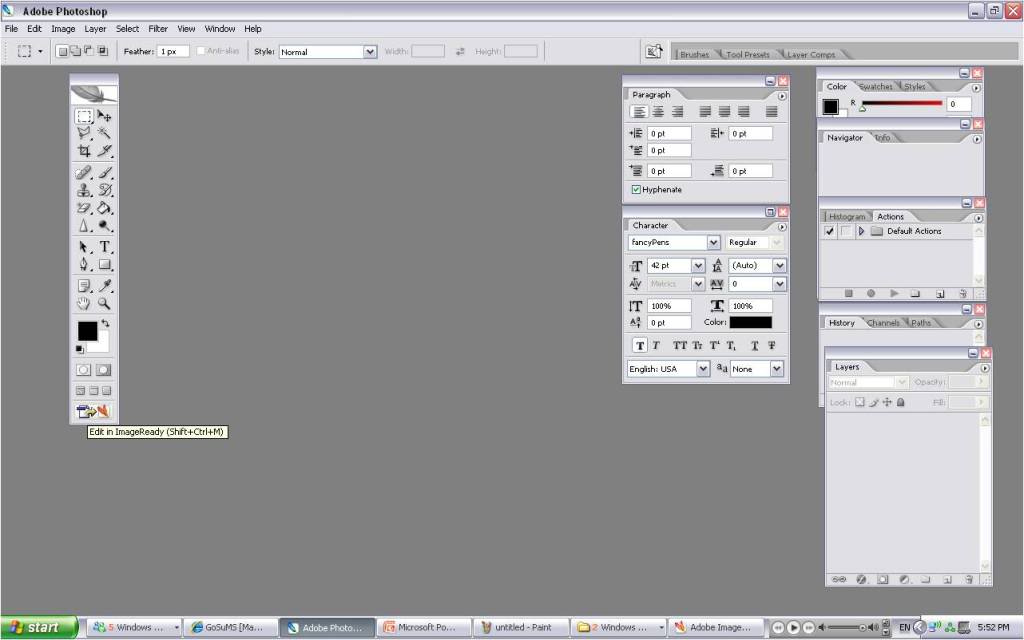
#11. Click on the last Icon of the Tool Box. It'll show 'Edit in ImageReady (Shift+ctrl+M)
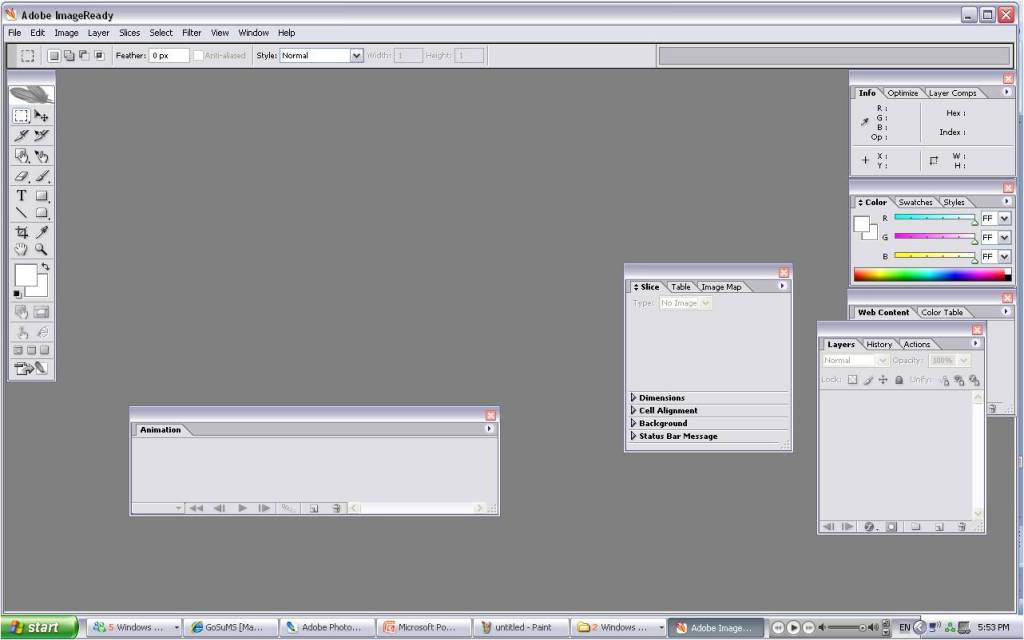
#12. There you can make your char animate.
I'll post that up soon. | |
|
cihadpx68
Admin

Posts : 41
Join date : 2008-11-12
Age : 28
Location : Holland
| | Subject: problem Sat Nov 15, 2008 1:57 pm | |
| When I click Shift+CTRL+M it says : Please convert the image to 8 bit RGB color mode before you edit in ImageReady...
I did Color Mode : RGB Color 8 Bit when i hitted new....
What to do? | |
|

